
When it comes to handling a roof leak in Homestead, it is crucial to address the issue promptly and efficiently to prevent further damage to your property. SKYPRO Roofing, a leading provider of professional roofing services, understands the importance of a well-maintained roof. Our team of experts specializes in comprehensive solutions, ranging from thorough inspections to meticulous repairs and replacements. With a strong focus on quality craftsmanship and customer satisfaction, SKYPRO Roofing offers tailored services to meet your specific roofing requirements. By entrusting us with your roof leak repair needs, you can rest assured that the integrity and longevity of your roof will be preserved, providing you with peace of mind and protection for your Homestead property. Click here for more information about Homestead Florida
Roof leaks can cause significant damage to your home and should be addressed promptly to prevent further issues. Identifying the source of the leak is the first step in repairing a roof leak in your Homestead property. In this article, we will guide you through the process of repairing a roof leak, from identifying the source to preventing future leaks.
Resolve Commercial Roof Leak Issues Today! Contact Us for Swift Repairs.
Start by inspecting your attic for any signs of water damage or leaks. Look for water stains on the ceiling, dampness or mold on the walls, and any signs of water dripping or pooling. It’s essential to identify the exact location of the leak to ensure effective repairs.
Water stains on your ceiling are a clear indication of a roof leak. Look for discolored patches or dark spots, which often indicate water seepage. Trace the source of the stain back to the roof to determine the area that needs repair.
Missing or damaged shingles can be another common cause of roof leaks. Inspect your roof from the ground and look for any visible signs of shingle damage, such as curling, cracking, or missing shingles. These issues can allow water to penetrate beneath the surface and cause leaks.
Flashing is the material used to seal joints and transitions on your roof, such as around chimneys and vents. Inspect the flashing for any signs of damage or deterioration, such as cracks, gaps, or corrosion. Faulty flashing can be a significant source of roof leaks and should be repaired or replaced promptly.
If you are unable to identify the source of the leak or if the damage seems extensive, it may be beneficial to hire a professional roofing inspector. A professional will have the expertise and experience to identify the cause of the leak accurately and recommend the necessary repairs.
Before starting your roof leak repair, it’s essential to gather all the necessary tools and materials to ensure a smooth and efficient process. Here are some essential items you may need:
Ensure you have all the necessary tools and materials before starting your roof leak repair to avoid any unnecessary interruptions or delays.
Preparing the work area is crucial to ensure safety and efficiency during your roof leak repair. Follow these steps to prepare your work area effectively.
Before starting any work on your roof, prioritize your safety. Ensure you have the necessary safety gear, such as gloves, goggles, and a helmet. Use a sturdy ladder to access the roof and make sure it is securely placed on a stable surface.
Remove any debris, leaves, or twigs from the roof before starting your repair. Debris can obstruct your work and prevent a proper seal, leading to future leaks. Use a broom or brush to sweep away any loose debris.
If you have fragile or valuable items in your attic, such as furniture or electronics, it’s essential to cover them to protect them from dust or potential water damage during the repair process. Use a tarp or plastic sheet to cover these items properly.
For minor roof leaks, you can often perform the repairs yourself. Here’s how to fix minor leaks in your Homestead roof.
Inspect your roof for small cracks or gaps and apply roofing cement to seal them. Use a putty knife or a trowel to spread the cement evenly over the damaged area. Make sure to cover the entire crack or gap with a thin layer of cement.
If you notice any damaged or missing shingles, it’s crucial to replace them promptly. Carefully lift the surrounding shingles and remove the damaged or missing ones. Place the new shingle in the same position, ensuring it aligns with the adjacent shingles. Secure the new shingle with roofing nails.
Damaged flashing can also be a common cause of roof leaks. If your flashing is cracked or corroded, remove the damaged section and replace it with new flashing. Secure the new flashing with roofing nails and seal the edges with roofing cement for added protection.
For more significant roof leaks, additional repairs may be necessary. Follow these steps to address larger leaks in your Homestead roof.
If the leak is severe or causing significant damage, cover the affected area with a tarp or plastic sheet to prevent further water infiltration. This temporary solution will provide immediate protection until the repair can be properly executed.
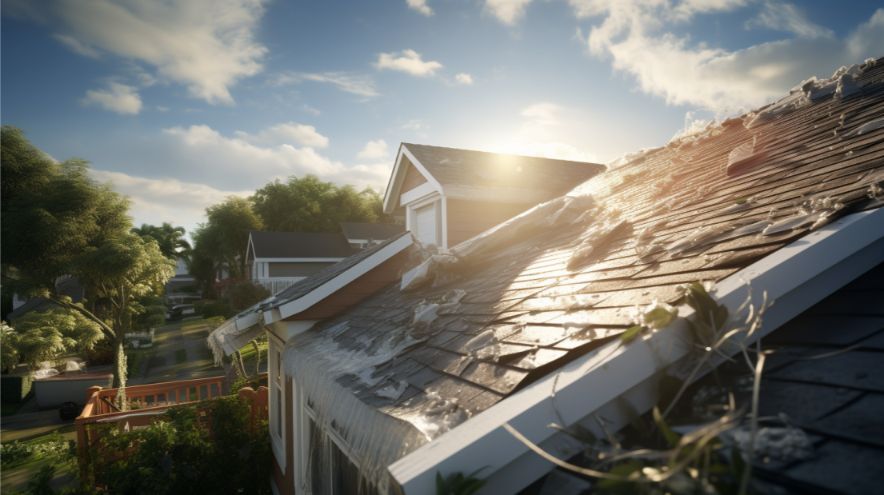
To repair a larger leak, you may need to remove the damaged shingles and the underlying materials. Carefully lift the surrounding shingles and remove the damaged ones. Take caution when removing the underlying materials to avoid further damage.
Inspect the decking or sheathing beneath the damaged area for any signs of rot or water damage. If necessary, replace the damaged sections to ensure a stable and durable roof structure.
Once the underlying materials are repaired or replaced, install new shingles in the affected area. Make sure they align with the surrounding shingles and secure them with roofing nails.
To create a watertight seal, apply roofing cement along the edges of the new shingles. This will provide an extra layer of protection and prevent future leaks.
If your repair required removing or replacing flashing, make sure to reinstall it correctly. Secure the flashing with roofing nails and apply roofing cement to seal the edges. Properly installed flashing will help prevent future leaks around chimneys and vents.
Chimneys and vents are vulnerable areas for roof leaks. Follow these steps to address leaks around chimneys and vents in your Homestead home.
Carefully inspect the flashing around chimneys and vents for any signs of damage or deterioration. Look for cracks, gaps, or corrosion that may cause leaks. Damaged flashing should be replaced promptly to prevent further water infiltration.
If your flashing is damaged, remove the old flashing using a pry bar or a similar tool. Take care not to damage the surrounding materials during the removal process.
Before installing new flashing, clean the area around the chimney or vent thoroughly. Remove any debris, dirt, or old sealant to ensure a proper seal with the new flashing.
Cut a new piece of flashing to fit the area around the chimney or vent. Carefully position the flashing, ensuring it covers the joints and transitions properly. Secure the flashing with roofing nails.
To create a watertight seal, apply roofing cement along the edges of the new flashing. This will help prevent any water from seeping through the joints and causing leaks.
Proper attic ventilation is essential for maintaining the integrity of your roof and preventing leaks. Follow these steps to ensure proper ventilation in your Homestead property.
Inspect your vents for any signs of clogs or damage. Blocked or damaged vents can inhibit proper airflow and cause moisture buildup in your attic. Clear any debris or obstructions and repair or replace damaged vents as necessary.
Make sure that vents and intake areas are free from debris and obstructions. Clear away any leaves, twigs, or other materials that may impede proper ventilation.
If you notice any damaged vents, such as cracked or broken pieces, repair or replace them promptly. Damaged vents can compromise the airflow in your attic and lead to moisture-related problems.
If you are experiencing ongoing ventilation issues or excessive moisture in your attic, consider improving insulation and attic ventilation. Proper insulation will help regulate temperature and prevent condensation, reducing the risk of roof leaks.
While some roof leaks can be repaired by homeowners, others may require professional assistance. When deciding whether to hire a professional roofing company to repair your roof leak in Homestead, consider the following factors.
Assess the complexity and extent of the roof leak to determine if it exceeds your DIY capabilities. If the leak is widespread, significant, or involves structural damage, it’s best to consult with a professional.
Research and consult with professional roofing companies in your area. They can assess the damage and provide recommendations for repairs. Look for reputable companies with experience in roof leak repairs.
Obtain multiple quotes from different roofing companies to compare prices and services. A detailed quote will give you a better understanding of the repairs required and the associated costs.
Professional roofing companies have the knowledge, skills, and experience to address roof leaks effectively. They can provide warranties on their workmanship and materials, giving you added peace of mind.
Need Residential Roofing Repairs? Let’s Fix It! Get in Touch Now.
Once you have repaired your roof leak, it’s crucial to take preventive measures to avoid future issues. Follow these tips to prevent future roof leaks in your Homestead property.
Schedule regular roof inspections to spot potential issues before they turn into leaks. Inspect your roof at least once a year, following severe weather events or when you notice any changes to your roof’s condition.
Clogged gutters can cause water to overflow and seep into your roof, leading to leaks. Regularly clean your gutters to ensure they are free from leaves, twigs, and other debris.
Overhanging tree branches can scrape against your roof, damaging shingles and creating entry points for water. Trim any branches that are in close proximity to your roof to prevent damage and potential leaks.
Address any signs of damage or wear on your roof promptly. Replace missing or damaged shingles, repair damaged flashing, and address any other issues that may compromise the integrity of your roof.
Proper attic ventilation is crucial for preventing excessive heat and moisture buildup. Ensure your attic is adequately ventilated to reduce the risk of roof leaks and other related problems.
Repairing a roof leak in your Homestead property requires careful inspection, preparation, and the right tools and materials. By following the steps outlined in this article, you can effectively identify and repair roof leaks, ensuring the longevity and integrity of your roof. In some cases, it may be necessary to seek professional assistance to address complex roof leaks. Remember to take preventive measures to avoid future leaks and perform regular inspections to catch any potential issues early on. With proper care and maintenance, your Homestead roof will provide you with years of protection and peace of mind.
Get Your Roof Repair Sorted – Residential or Commercial, We’ve Got You Covered!
